
CareCloud CDP Tutorials
How to Automate Loyalty Program Workflows: A Step-by-Step Guide
Da Sabina Bednářová 7. 5. 2026 Tutorial Automazione, E-commerce, Invio di e-mail, Fedeltà
Running a loyalty program is just the first step. What truly drives customer engagement is timely and personalized communication. In this article, we walk you through three essential workflows every loyalty program needs and how to set them in the CareCloud platform.
PAWS&PLAY: A BRAND THAT REWARDS LOYALTY
We’ll focus on a fictional brand, Paws&Play, that offers high-quality dog food, treats, and toys. The brand has its own online store and mobile app, but most importantly, it runs a loyalty program.
In this guide, we’ll walk through three key loyalty workflows designed to boost engagement at different stages of the customer journey:
- Motivation for First Purchase
- Reminder of Unused Points
- Motivation to Achieve Higher Loyalty Status
Before we dive in, there’s one more thing to mention. Most loyalty program communication begins with a welcome email. In CareCloud, you can either send it as a one-off or add it to a smart drip campaign.
A drip campaign is a series of automated emails sent to new customers over time, triggered by specific actions or milestones. Its purpose is to nurture relationships, guide customers through the sales funnel, and keep them engaged with personalized, timely content.
Want to learn more? Read our blog post written on this topic here.
With the basics covered, let’s dive into the first workflow.
MOTIVATION FOR THE FIRST PURCHASE
With this workflow, you will motivate new customers to make their first purchase through a discount voucher, motivational emails, and extra points. Before moving on to the workflow, we must set these up.
Voucher Creation
Go to the Loyalty & Administration app, then to Loyalty settings, Rewards /vouchers, and Campaign rewards. Choose the discounted product.
Click on “Reward price and quantity settings” and configure the following:
- Click on Reward type and choose Percentage discount.
- Set the discount value to 10%.
- Set the minimum purchase amount to 15 €.
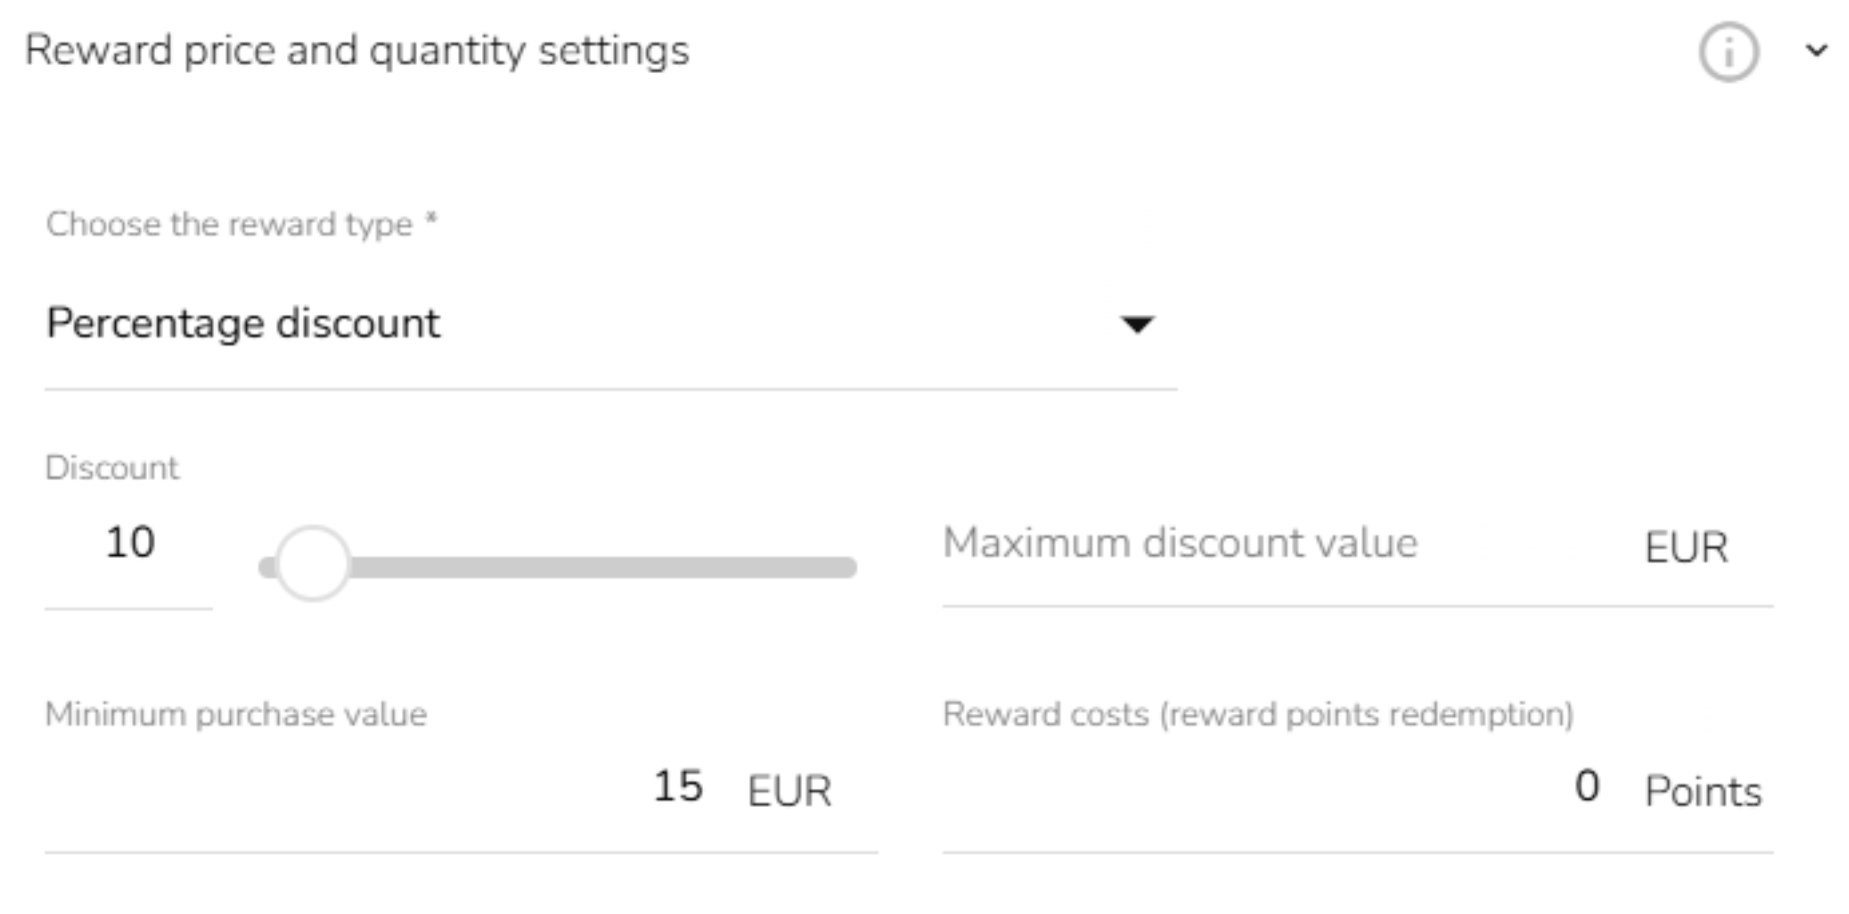
Lastly, find the “Voucher validity interval” and set it for one week.

Points Group Creation
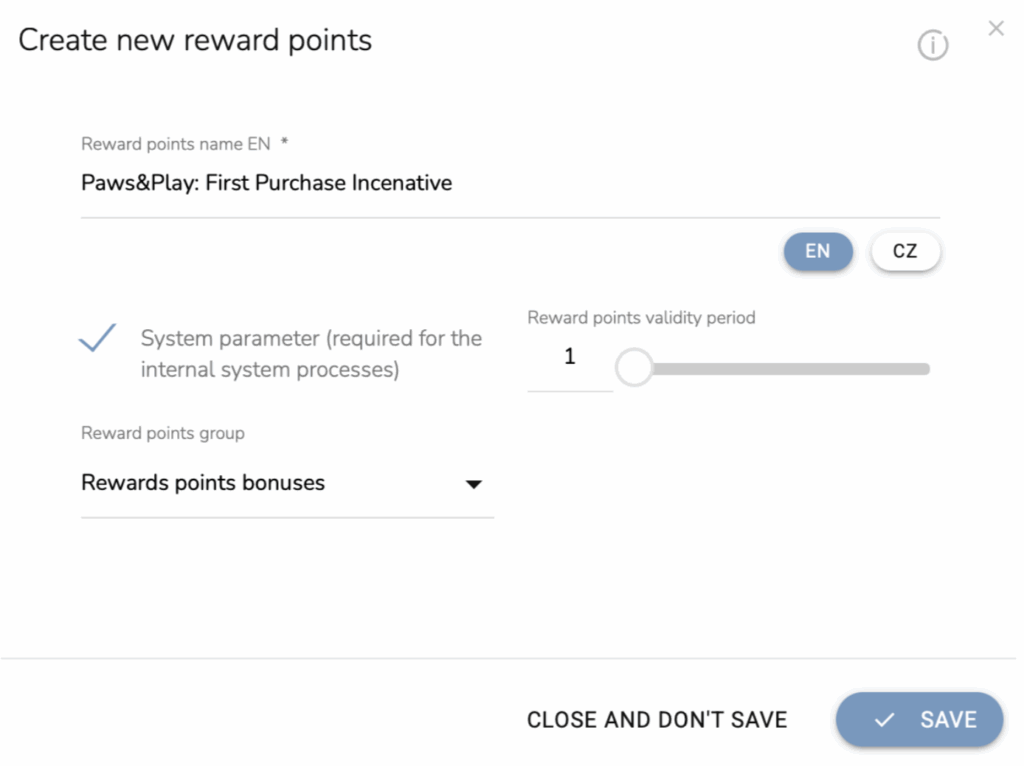
Now that we’ve successfully created the voucher, we need to set up the points group. Go to the “Reward points.”
Enter the name and mark this as a system parameter. Select the right group of points for better clarity and set the validity period of the points, i.e., in how many months they will expire.
Email Design Creation
Lastly, we will move to Email Designer. For this workflow, we need three emails:
- email with a voucher
- reminder email that the voucher will expire soon
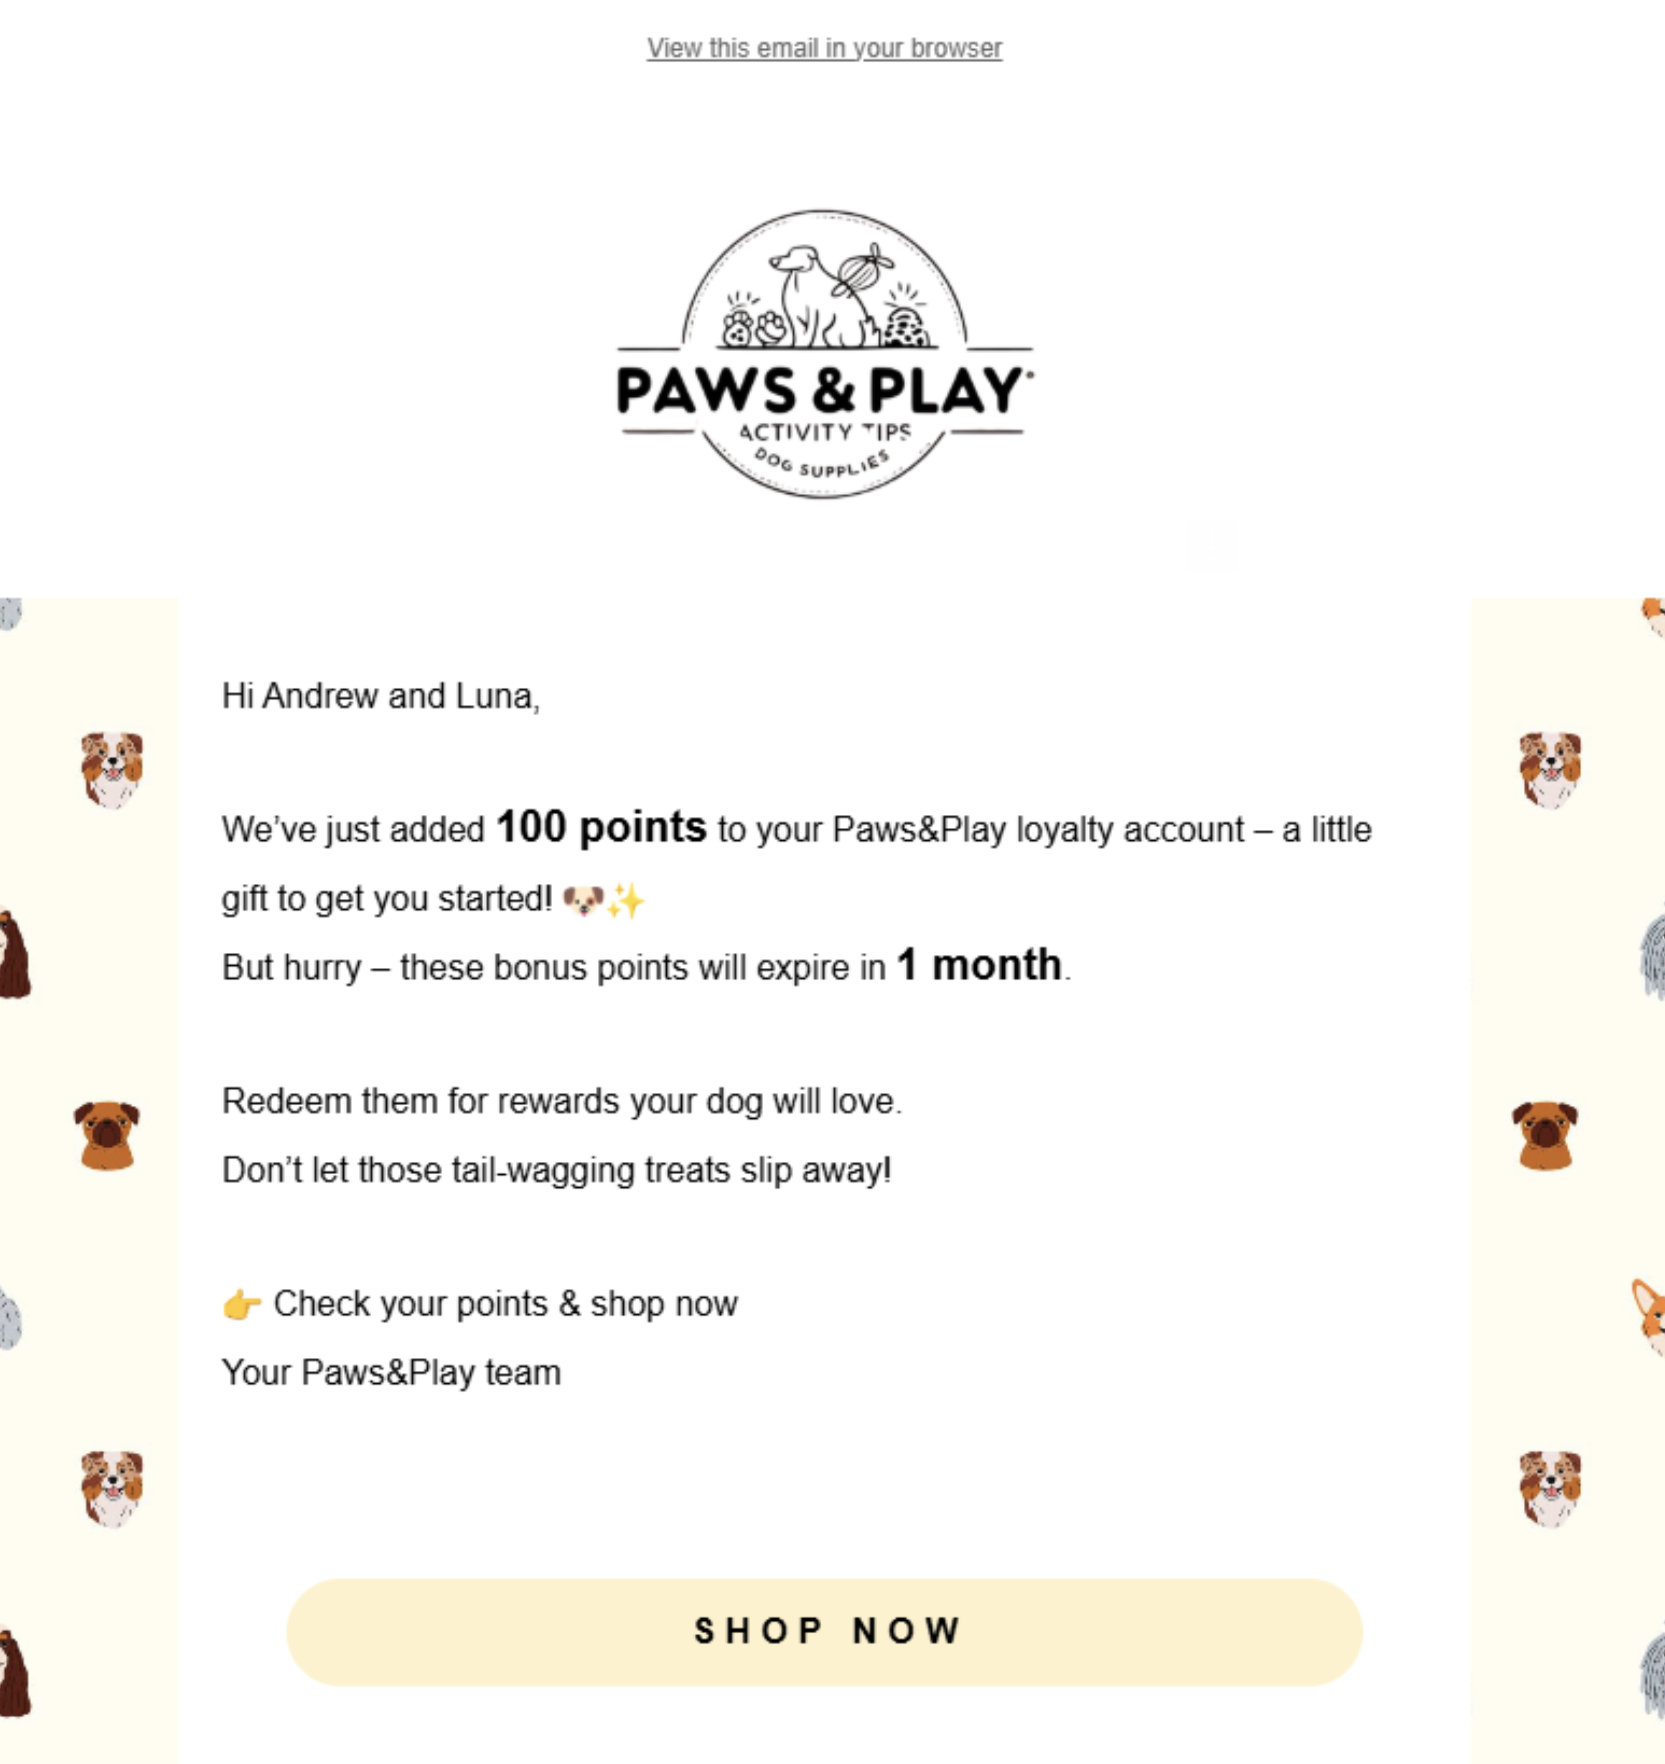
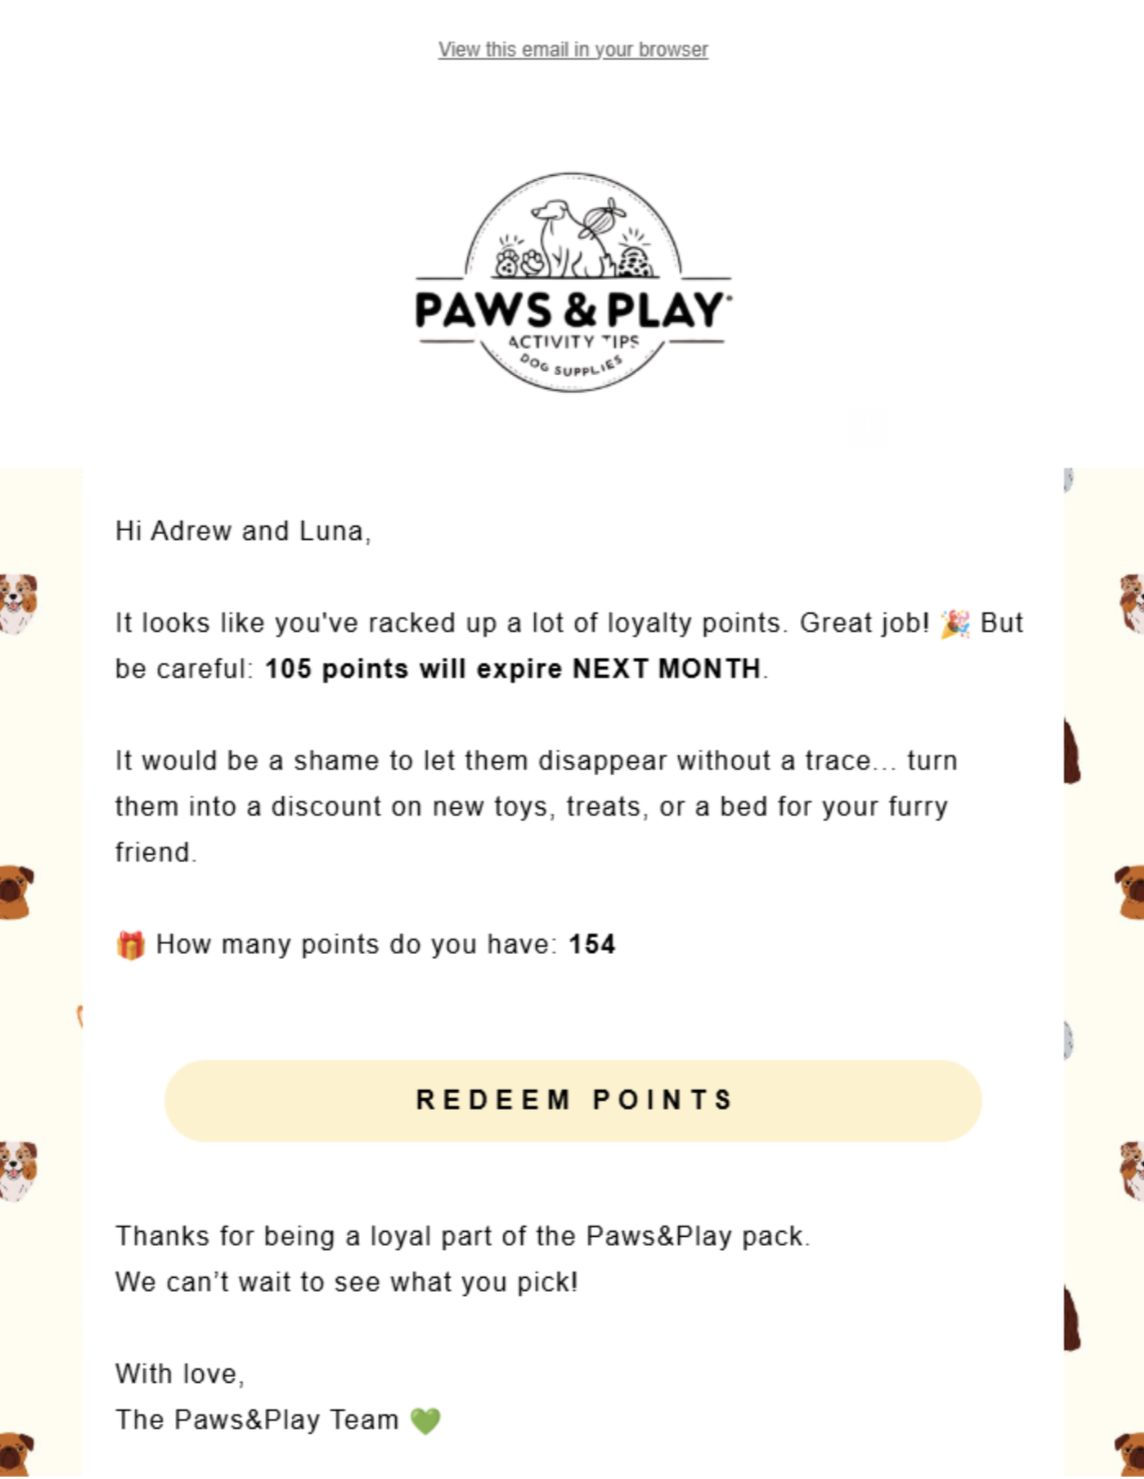
- email announcing we have added 100 extra points to their loyalty program
Here is an example of an email notifying customers about extra loyalty points. Create the other emails the same way.
Workflow Creation
Once the voucher, points group, and emails are ready, we can combine them into a single automated workflow.
The workflow starts when a customer joins the loyalty program. The system first checks whether we know the customer’s email address. After a few days, the system controls whether the first purchase has been made. If not, it sends an email with a 10% voucher.
After a few more days, the system tests again whether the customer has made a purchase. If the customer still hasn’t, the system sends a reminder email. If this does not work, the loyalty points are assigned with an expiring validity (valid for 1 month), and a final email is sent.
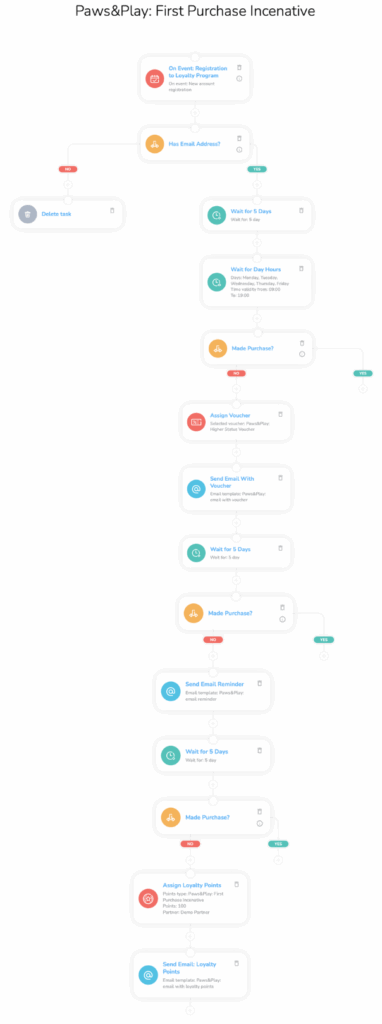
We will take a closer look at the most important parts of the workflow.
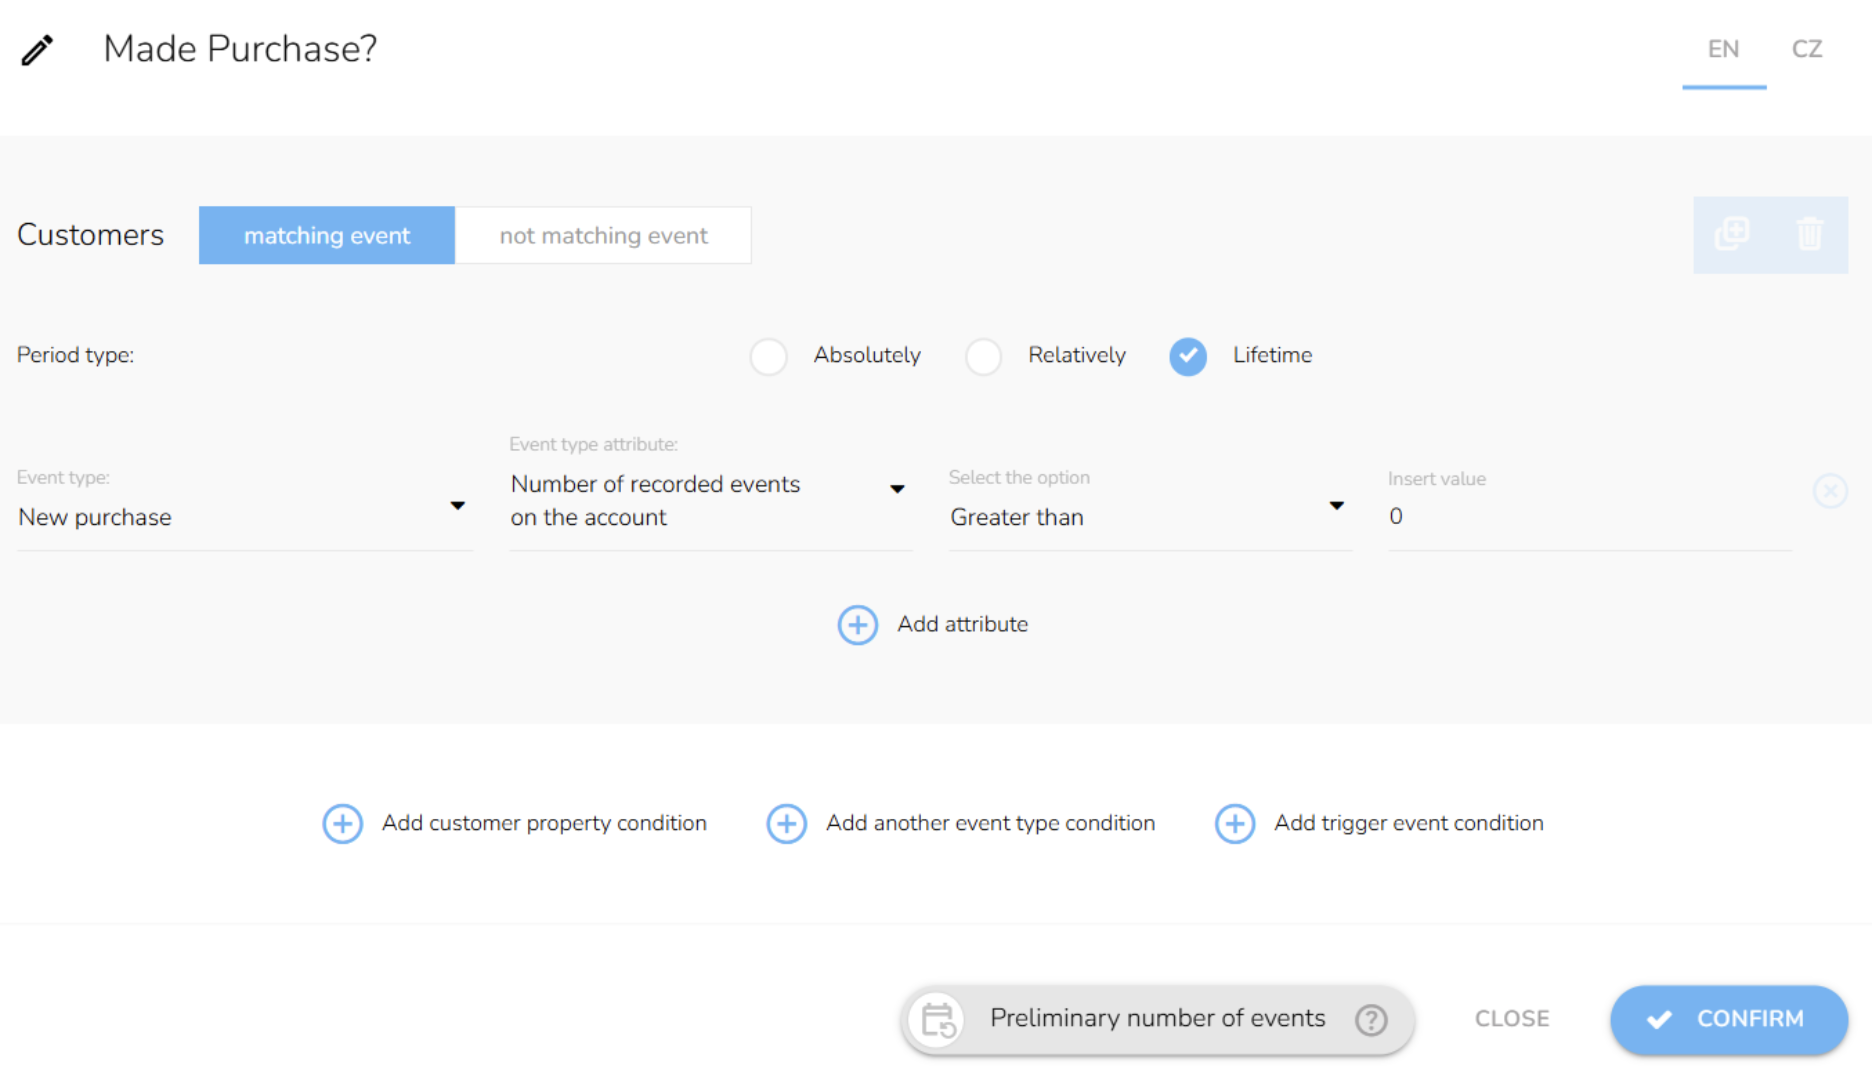
The “Made Purchase?” condition will check whether the customer has made a purchase. Choose “Add another event condition,” and set the rest as shown on the screen. This condition will be used three times in the workflow.
Next, click the Assign Campaign Voucher node and select the voucher we created earlier.

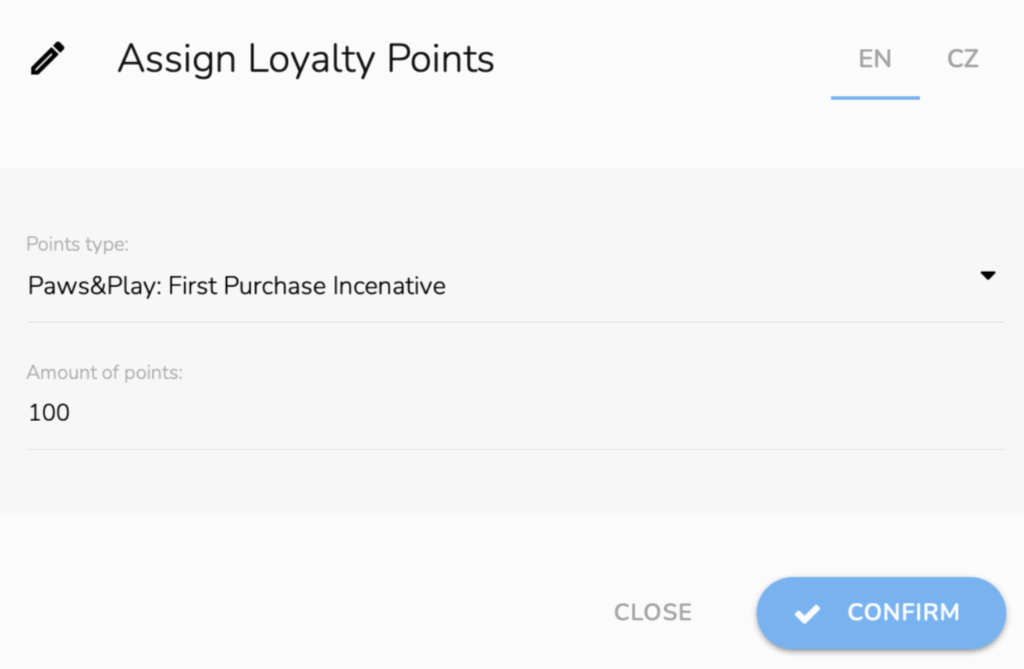
The last thing we will look at here is assigning loyalty points. Click on the “Assign Reward Points to the Customer” node, choose the point group we created earlier, and write down the number of points you want to assign to the customer.
Once the customer completes their first purchase, it’s time to focus on keeping them engaged, starting with a reminder about soon-to-expire loyalty points.
A REMINDER OF UNUSED POINTS
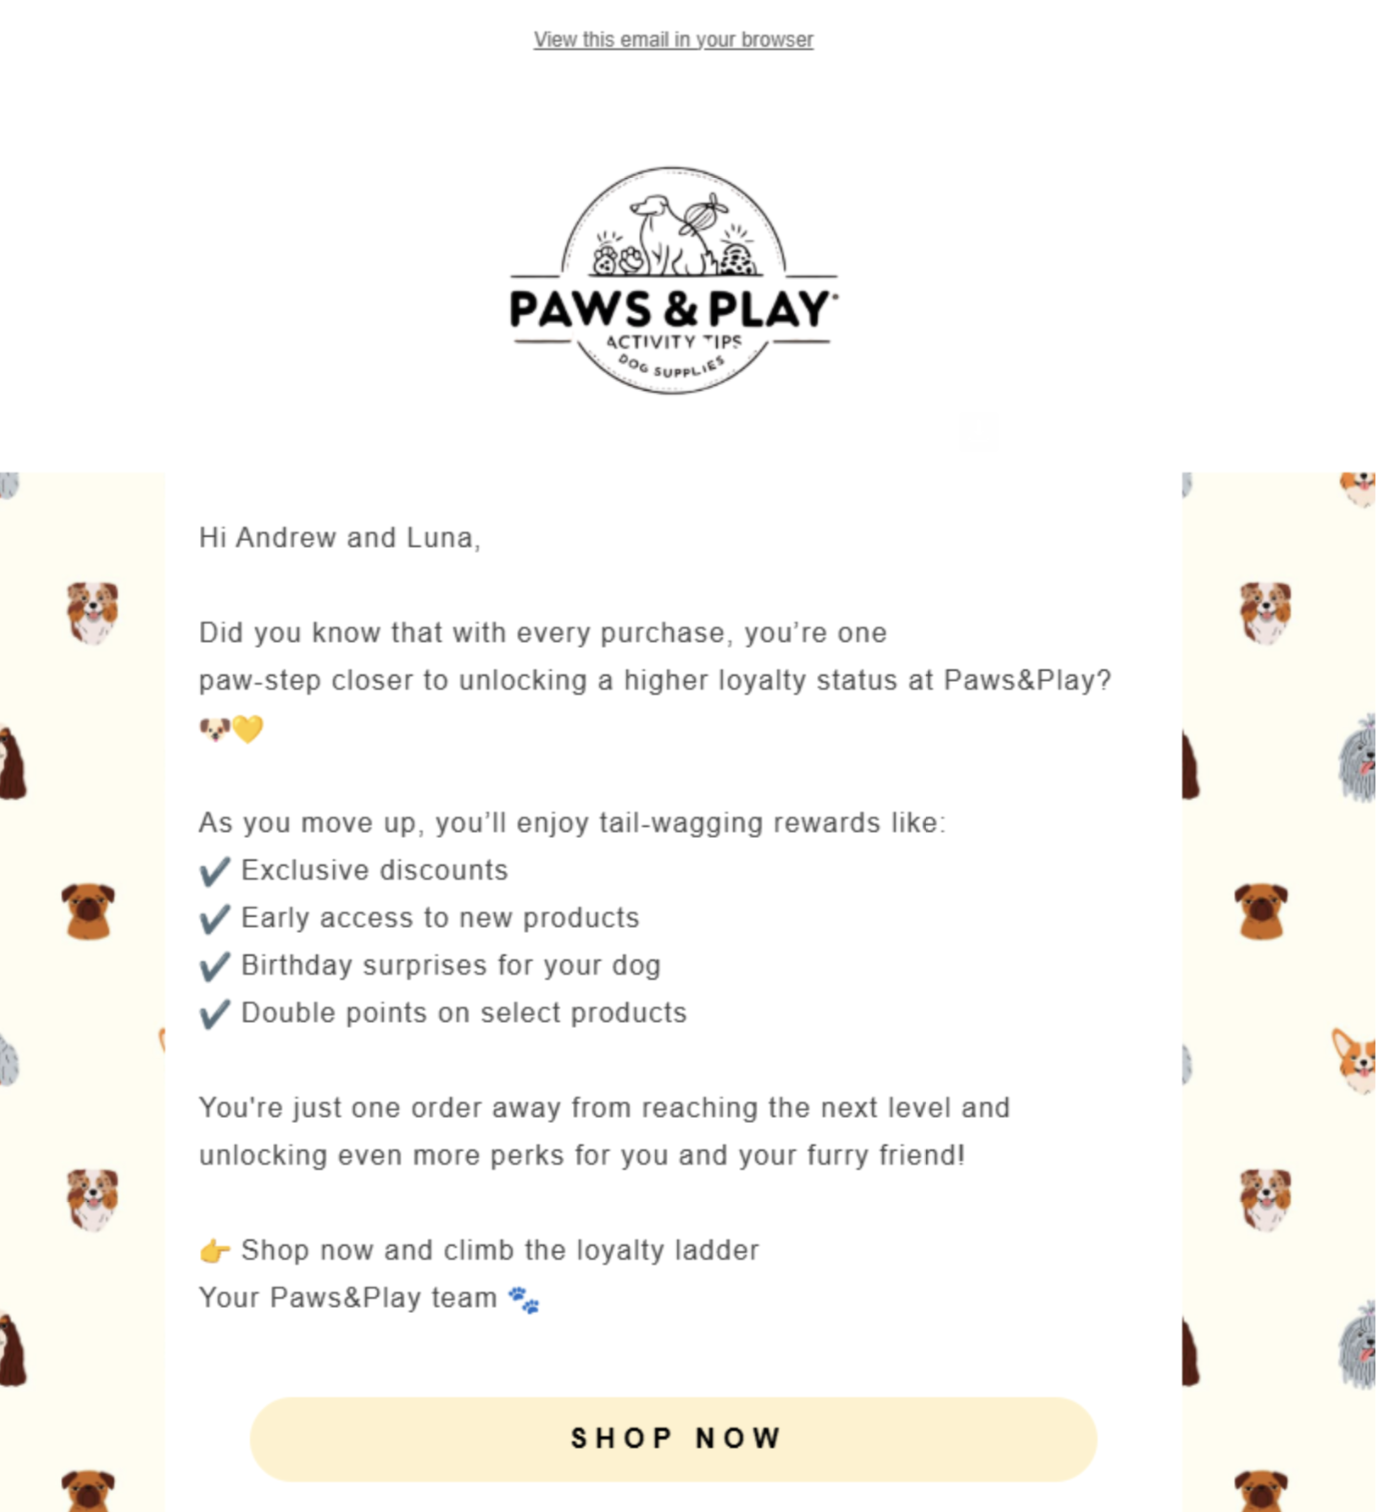
This second workflow reminds customers that their loyalty points are about to expire. You’ll need to design two emails for it. The first informs them about the unused points that will soon expire, and the second serves as a final reminder.
There is no need for a complicated message; simply let them know they have many points and that now is the perfect time to use them.
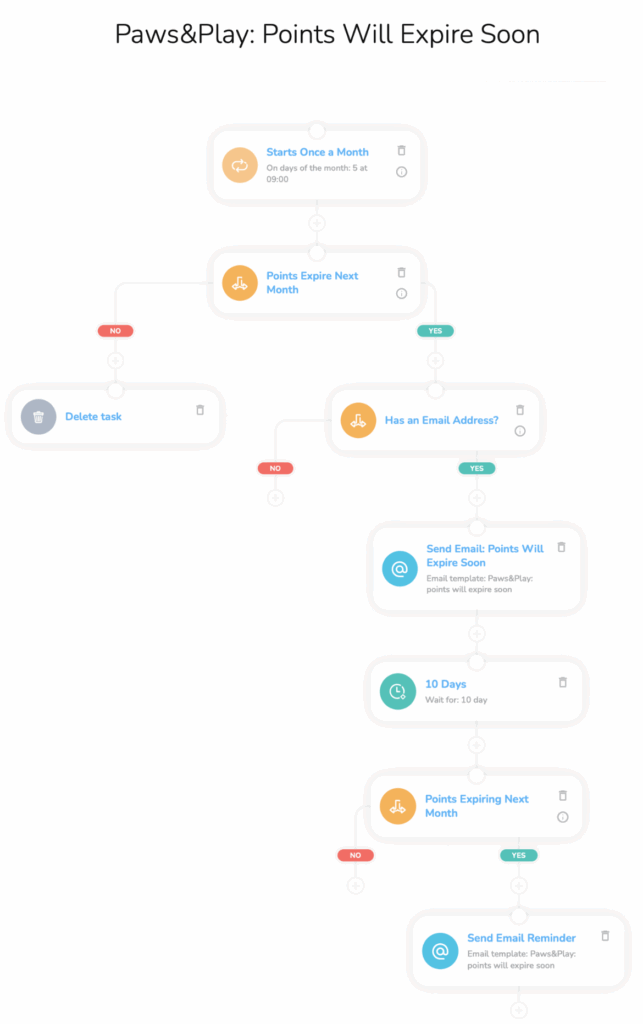
Let’s move on to the workflow. This one will run once a month to check if the customer has more than 99 points expiring next month. If so, the workflow will then send a reminder email.
After a few days, the workflow checks whether the customer has made a purchase. If yes, the workflow ends; if not, it will send a second email reminder.
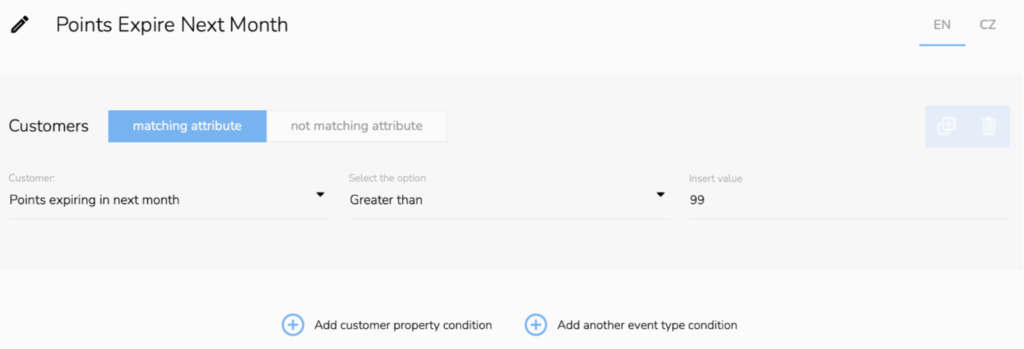
Let’s take a closer look at how to set the conditions. Start by clicking “Add customer property” condition, then select “Points expiring in the next month” with the value set to “Greater than 99.”
In the workflow, we have one more condition that will check whether the customer has used the points. We will set the condition the same way as the first one.
Let’s move to our last workflow.
MOTIVATION TO ACHIEVE HIGHER LOYALTY STATUS
To further boost long-term engagement, the third workflow focuses on customers who are just one step away from reaching a higher loyalty status and gives them a little nudge.
Paws&Play has defined that after 10 purchases, a customer reaches a higher loyalty status. To motivate the customer to make the last tenth purchase, we will email them the benefits of the higher status and, optionally, a voucher.
But first, you need to set up a voucher. Create it just like we showed you at the beginning. Let’s move on to the Email Designer. We need to design one email that highlights all the benefits of the higher status, and a second email with the voucher to motivate customers to purchase.
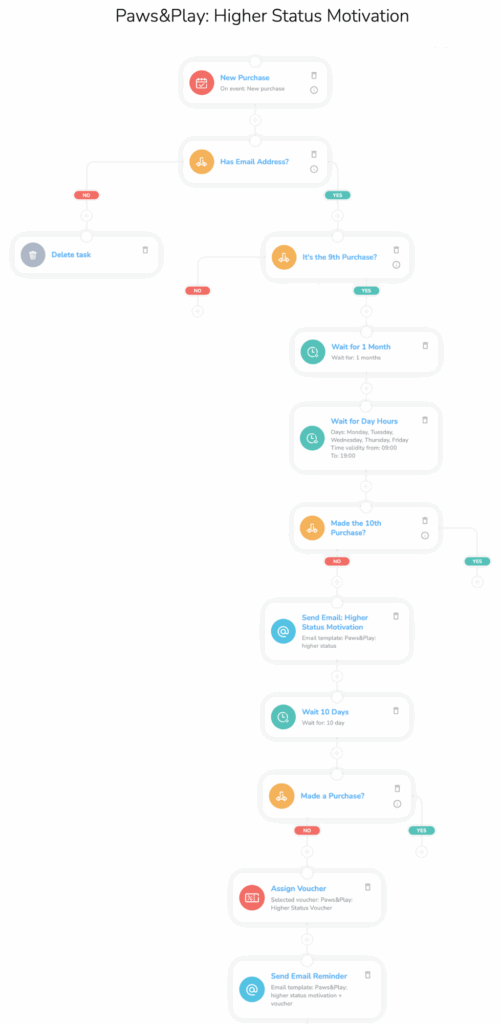
And now we finally get to the workflow. The New Purchase event triggers the workflow. Once again, it will first check the email address. Then the system tests if this is the customer’s 9th purchase.
Then the workflow waits for one month. Since the workflow is triggered by every new purchase, it’s important to wait a period that reflects the typical buying frequency before contacting customers again. For Paws&Play, customers usually buy once a month.
Keep in mind that the one-month delay is just an example. Adjust the waiting period based on your own average purchase frequency.
After this wait, the workflow checks if the customer has made another (tenth) purchase. If not, a motivational email is sent. The workflow then waits another 10 days. If there’s still no purchase, a voucher is sent to help drive conversion.
To set the first condition, choose the “Add trigger event” condition. Then, set “New Purchase,” “Number of recorded events on the account,” “Equal,” and “9.” This ensures that only customers who have made their ninth purchase continue through the workflow.

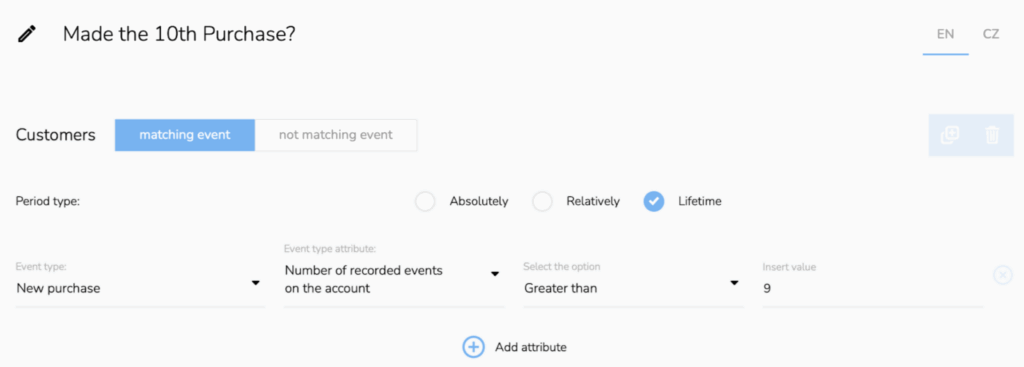
In the second condition, we check if the customer has made their tenth purchase. This is done using the same method, but there is one difference in the type of condition selection.
Although we are still looking at the same event type (New Purchase), this time we select the “Add Another event” condition, not the trigger event:
- Trigger event = checks only for the purchase that triggered the workflow.
- Another event = looks at all purchases the customer has ever made.
Then set the number of recorded events greater than 9.
There is one more condition in the workflow. But it will be done the same way as the second one.
NURTURE LOYALTY WITH SMART COMMUNICATION
A loyalty program is just the beginning. Smart communication makes it successful. As shown with Paws&Play, timely emails and personalized workflows help drive first purchases, remind customers of unused points, and highlight loyalty benefits.
With CDP & CRM CareCloud, you can easily automate these steps and deliver a seamless customer experience across all channels. Don’t let your loyalty program go silent. Guide and motivate your customers at every stage.
CONSIGLIATO
Che cosa è caldo?
GlassMorph Crystal Theme Discover a fresh new way to experience the CareCloud…
Omnichannel marketing delivers seamless experiences across multiple channels, but managing these campaigns…
Create an automated campaign that motivates customers toward reaching a higher membership…
Customer data is the lifeblood of digital marketing, but it only works…
Running a loyalty program is just the first step. What truly drives…